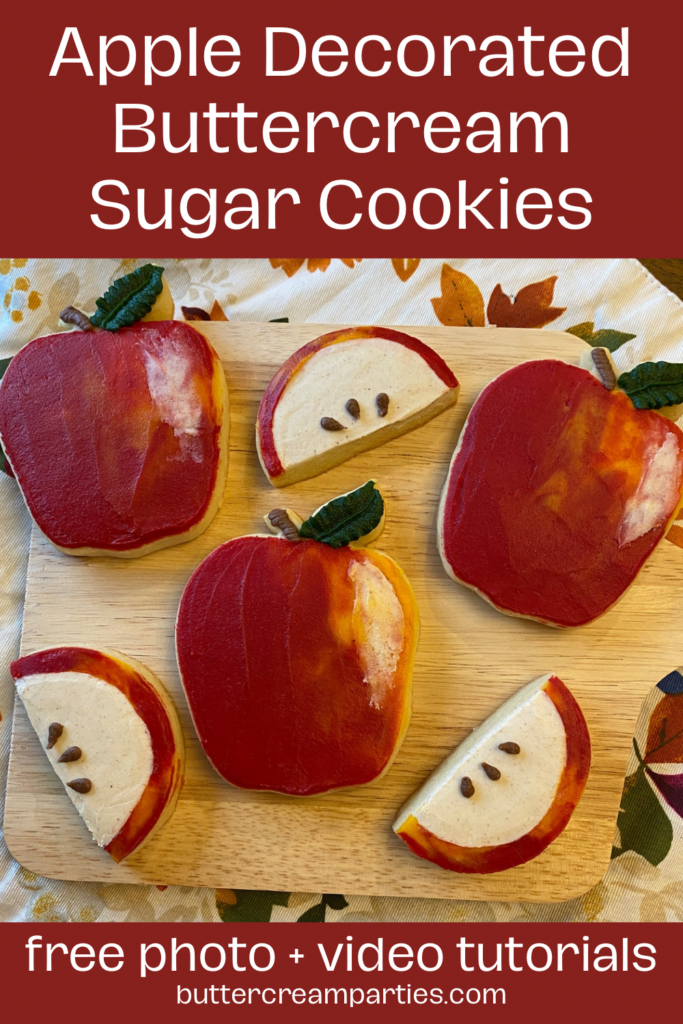
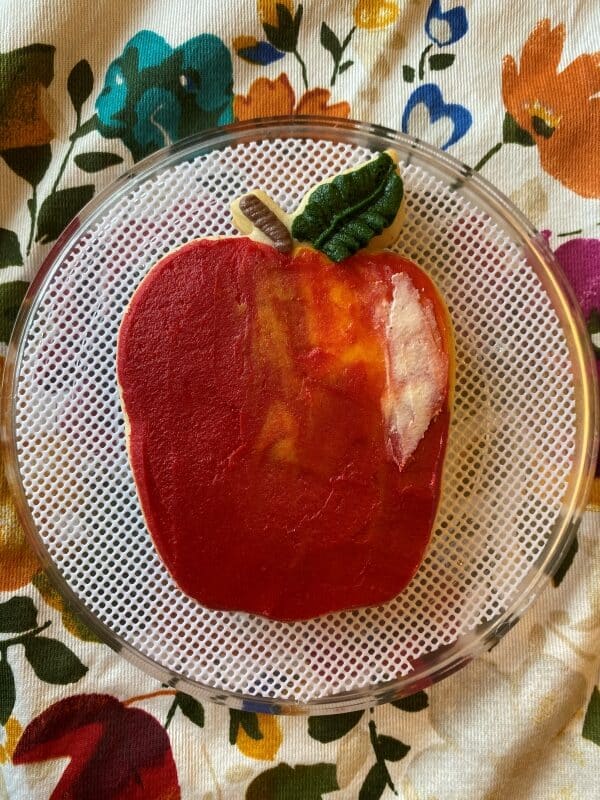
It’s now officially fall and my first fall tutorial of the year are these cute apple decorated sugar cookies. These apple sugar cookies are even topped with apple buttercream frosting!
To make these apples look a bit more realistic, I’ve used a blending buttercream technique. I will be teaching you how to do this technique step-by-step in the photo series and video tutorial below.
It isn’t difficult if you have used a palette knife before, one of my favorite tools. If you are completely new to buttercream sugar cookie decorating, I think you will be amazed at what you can accomplish.
Let’s dive into the tutorials!
*This post may contain affiliate links, which means I may receive a commission, at no extra cost to you, if you make a purchase through a link. Please see my full disclosure for further information.*
Part 1: Gathering the Supplies for the Apple Decorated Sugar Cookies

To decorate these cute apple decorated sugar cookies, you will want to gather:
- 5 Icing bags
- 3 Couplers
- One Wilton #2 tip, one Wilton #3 tip, and one Wilton #69 tip
- Circle cookie cutter – cut in half for each slice, Wilton 101 cookie cutters set
- Apple cookie cutter
- Red, green, yellow, and brown gel food dye
- Palette knife
- Ingredients for a crusting buttercream – I used my delicious apple buttercream recipe
- Ingredients for sugar cookie dough
Part 2: Baking the Cookies and Setting up the Icing Bags
Roll, cut out, and bake your sugar cookies according to the recipe that is linked in the above section. To make the apple slice cookies, simply cut each circle cookie in half prior to baking.
Make your buttercream icing according to the recipe (if you don’t want apple, here’s my regular crusting buttercream recipe). Separate the prepared buttercream into five bowls:
- One bowl only needs a small amount for the apple stems & seeds, dye this bowl brown
- Another bowl can remain undyed, this is the apple slice & highlight color
- One bowl needs to be dyed red
- One bowl needs to be dyed yellow
- The last bowl needs to be dyed green, I went with a mossy green – mix some brown into the green frosting to create this color
Set up your icing bags as follows:
- Place the tip #69 into an icing bag and fill it with the green frosting.
- Place the tip #2 into an icing bag and fill it with the undyed/white buttercream.
- Place a coupler into each of the remaining three icing bags and fill them with the brown, red, and yellow frosting. You do not need to add the decorating tips yet.
Part 3: Decorating the Apple Sugar Cookies
Check out the video tutorial showing both the apple cookie and the apple slice cookie then follow the step-by-step photo series tutorials below.
How to Decorate Apple Cookies
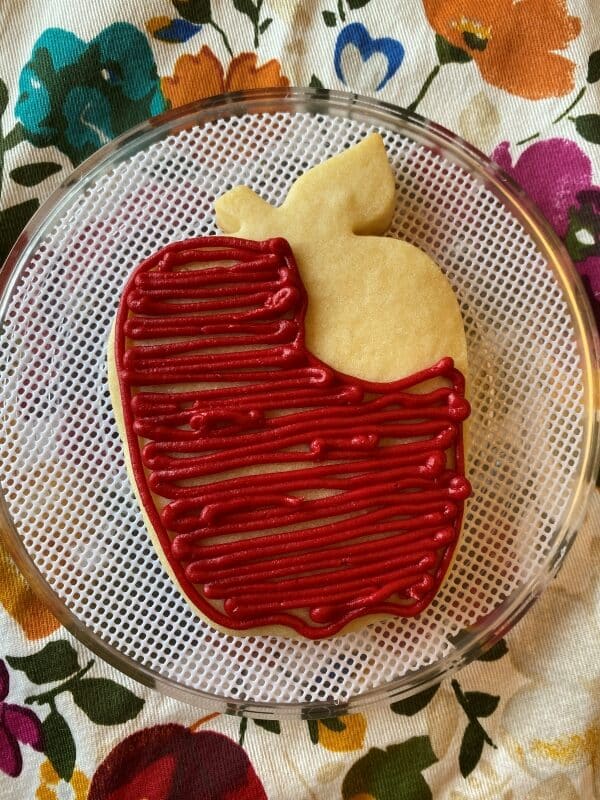
- Attach the tip #3 to the red bag of frosting and outline and fill in the majority of the apple on the apple cookies. You can be sloppy here, as you will fix it in the next step.
![outline and fill in red portion of apple with buttercream]()
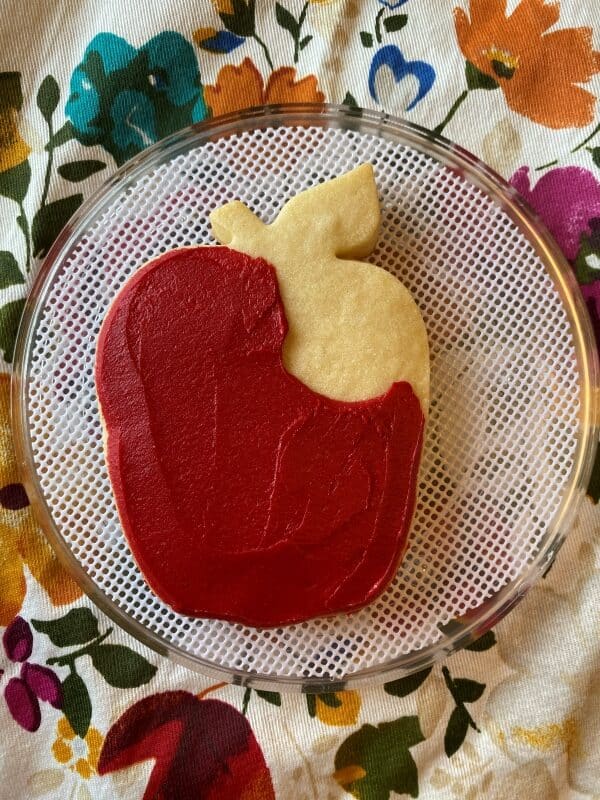
- Use the palette knife to smooth out the red frosting. Do this step on a few apples before moving to step 3. You don’t want to do too many apples as the frosting should not crust before the next step.
![smoothed red buttercream]()
- Remove/rinse/dry the tip #3 from the red frosting and place it into the yellow frosting bag. Outline and fill in the rest of the apple.
![outline and fill in yellow portion of apple with buttercream]()
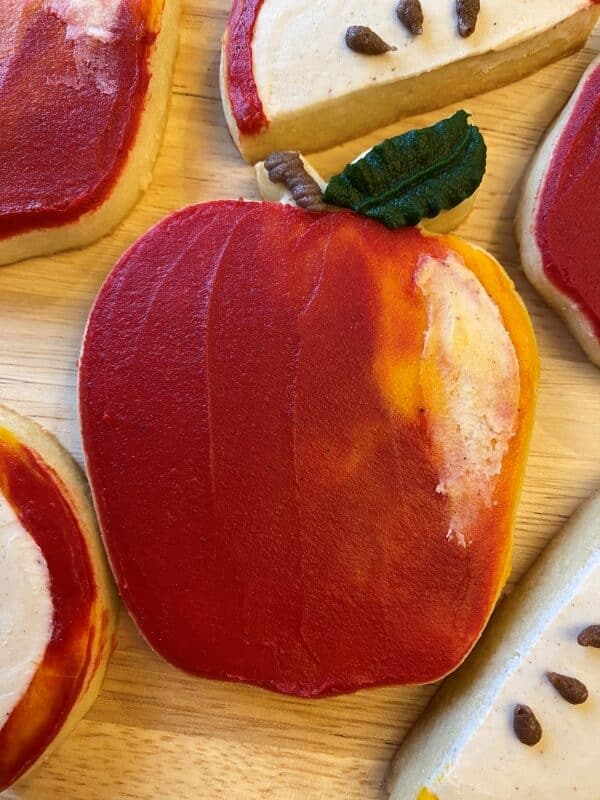
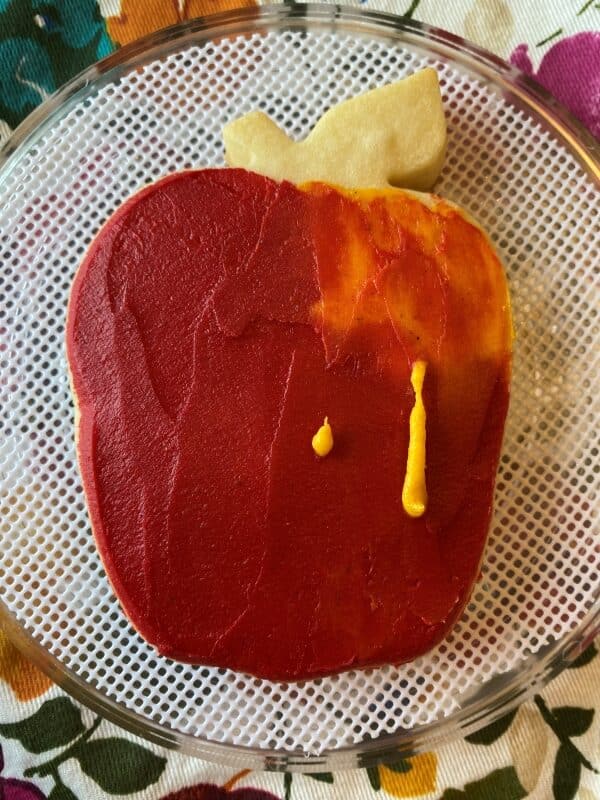
- With the palette knife, smooth the yellow out and into the red frosting. Mix some areas of red and yellow together to create a more realistic look.
![adding yellow to the red apple]()
![blending the yellow and red buttercream on the apple decorated sugar cookies]()
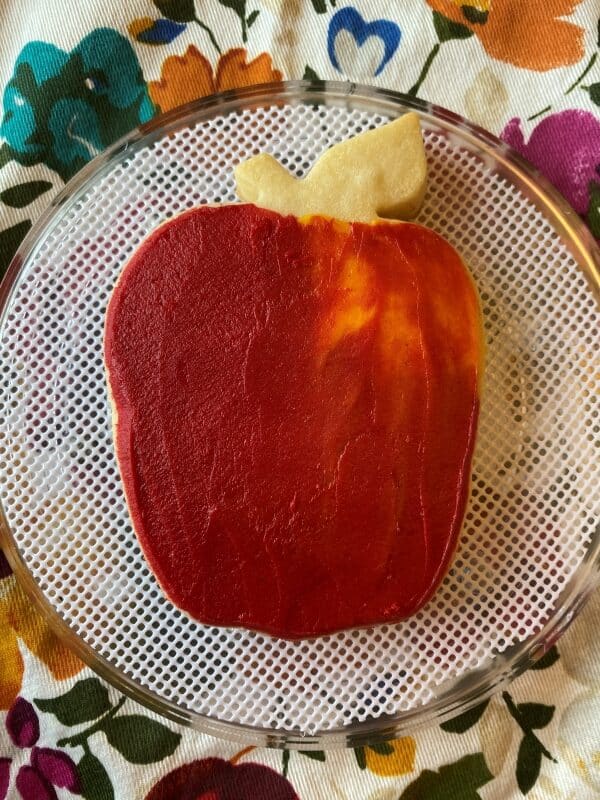
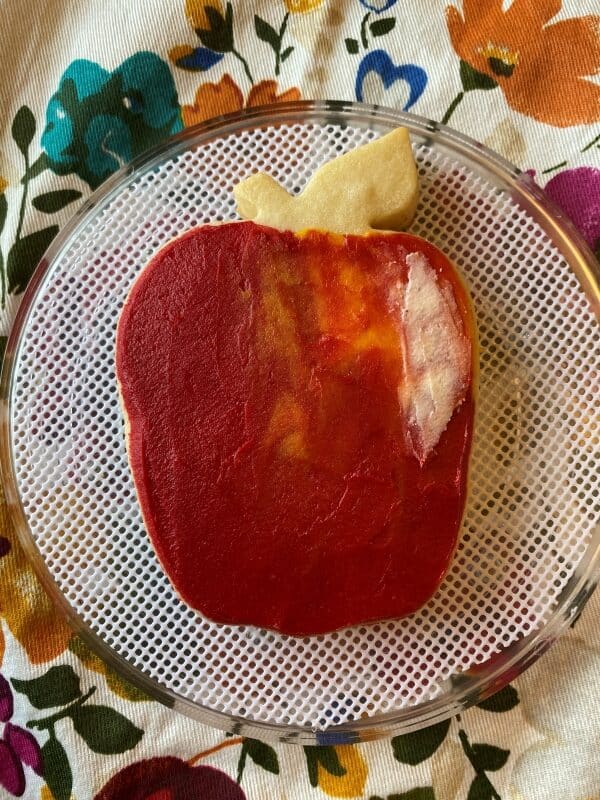
- Using the white frosting with tip #2, pipe an area of highlight and then smooth it with the palette knife.
![adding the white highlight with buttercream]()
![smoothed the white buttercream with a palette knife]()
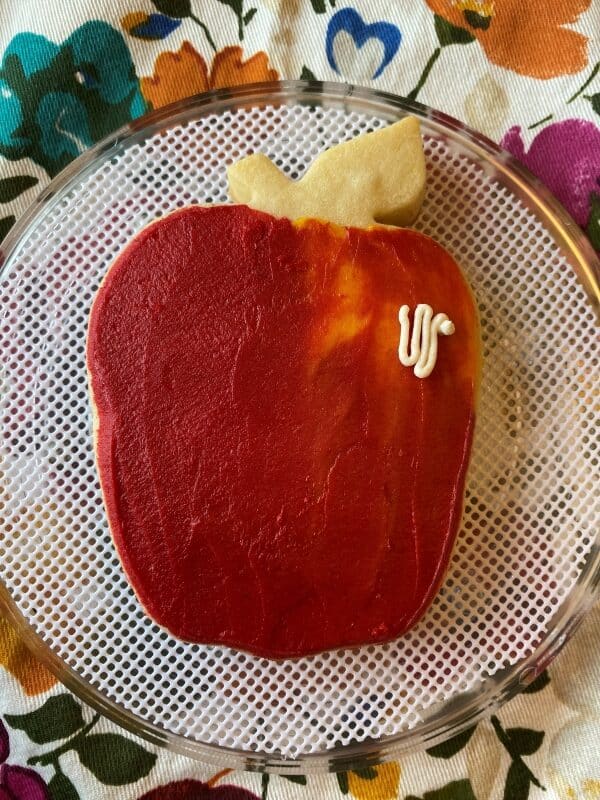
- Remove/rinse/dry the tip #3 from the yellow frosting and place it onto the brown frosting. Pipe out the apple stem, going slower while applying pressure as you get closer to the end to create a thicker end.
![add the brown stem]()
- Use the green frosting with the tip #69 to pipe the apple leaf. To pipe leaves, hold the icing bag in the same spot while applying pressure to create a wider part and move faster to create a smaller part.
![add the green leaf to the apple decorated sugar cookie]()


How to Decorate Apple Slice Cookies

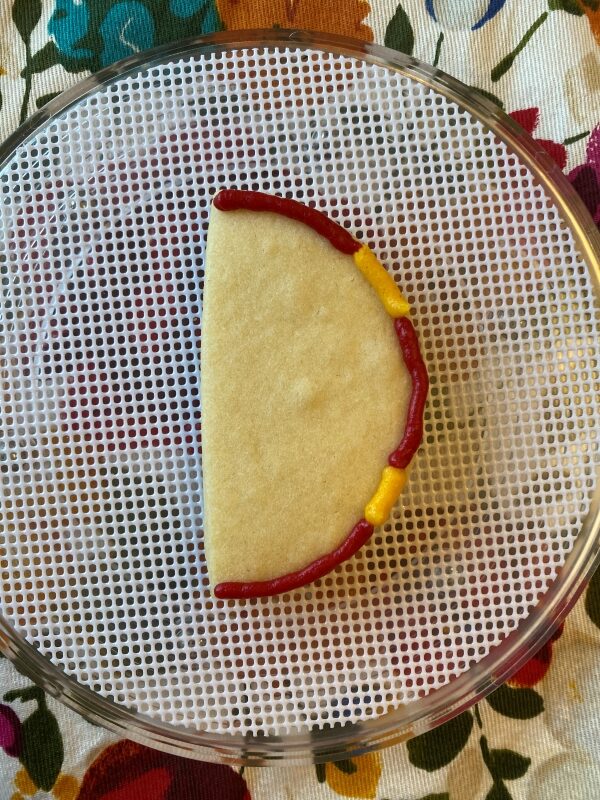
- Attach the tip #3 to the red bag of frosting and pipe out some lines along the curved edge of the apple slice cookie. Do this on a few of the apple slice cookies before moving to the next step.
- Remove/rinse/dry the tip #3 from the red frosting and place it onto the yellow frosting. Pipe lines onto the curved edge of the apple slice where the red was not placed.
![red and yellow buttercream for apple skin]()
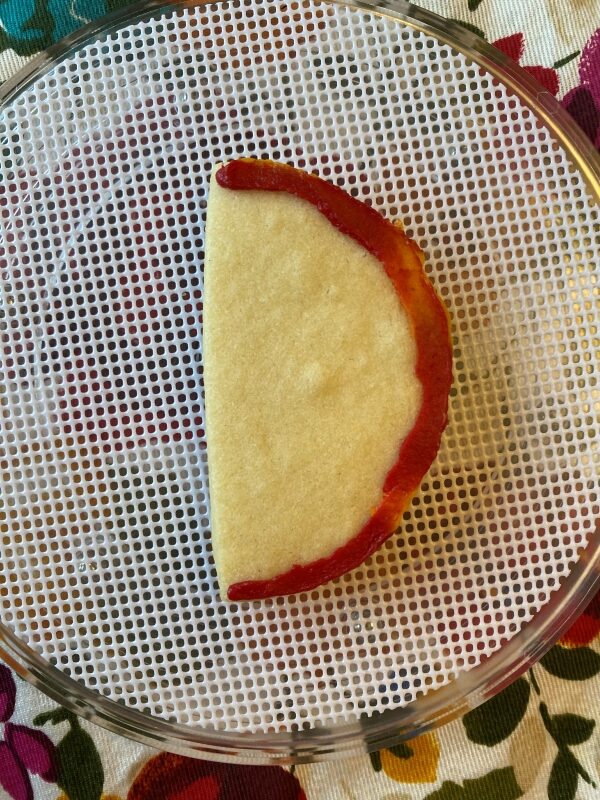
- Smooth this outline together with the palette knife, mixing the red and yellow, to create the apple edge. You can make this as thick or thin as you’d like. Use the palette knife to then clean up the edges and the inner curve.
![smoothed apple skin]()
![apple skin with buttercream]()
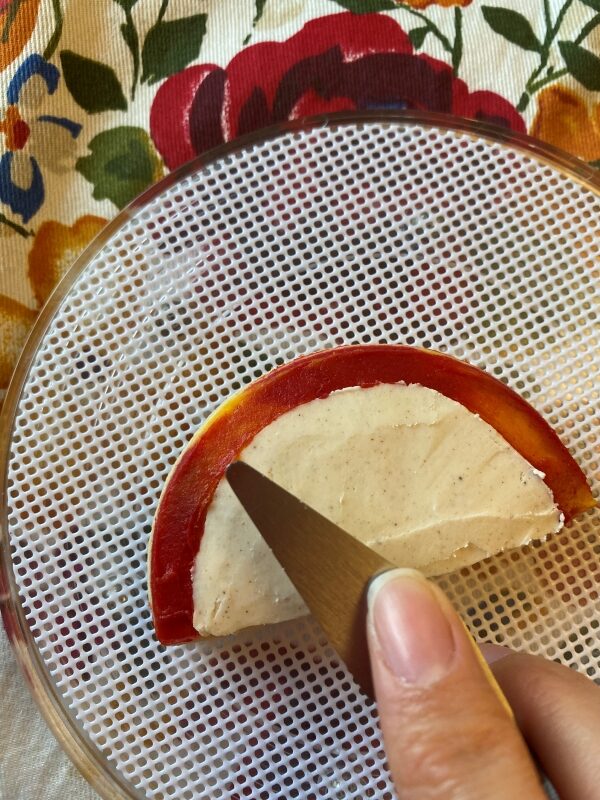
- Use the white frosting with the tip #2 to carefully outline the inner part of the curved red/yellow line. You may want to do two rows of outline. Then, fill in the rest of the apple slice with the white frosting.
![white added to the apple slice buttercream sugar cookie]()
- Place the apple slice cookies into the freezer for 5-10 minutes.
- Grab one apple slice cookie from the freezer and smooth out the frosting to create a smooth finish. When getting close to the areas the white and red/yellow meet, move carefully to not mix the two together.
![carefully smoothing the frozen buttercream with a palette knife]()
![apple slice buttercream sugar cookie]()
- Continue grabbing one apple slice from the freezer at a time and repeat step 6 until all of the apple slice cookies are caught up.
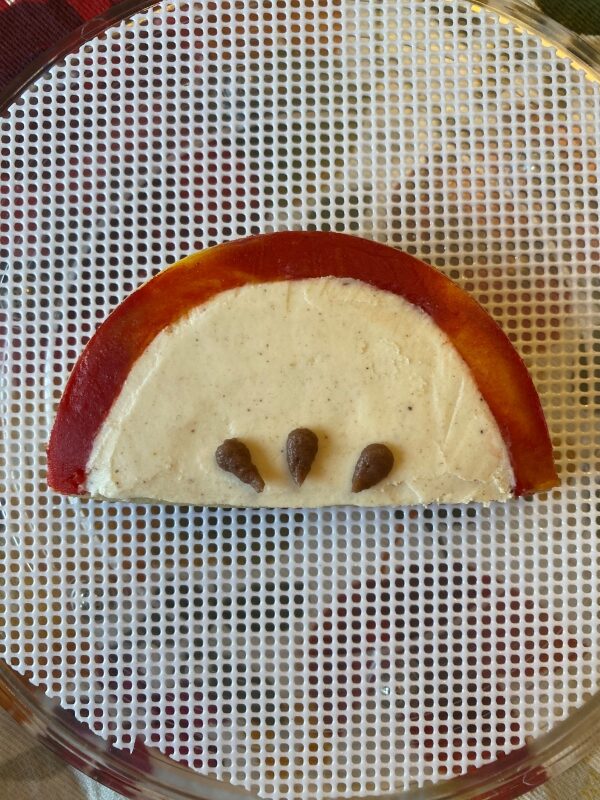
- Remove/rinse/dry the tip #3 from the yellow frosting and attach it to the brown frosting. Pipe three seeds onto each apple slice. I found this easiest to place the straight edge toward me, pipe a ball, then stop the pressure to create a teardrop shape.
![apple slice sugar cookie]()


Aren’t these apple decorated sugar cookies so fun? I love the more realistic look of them; it almost makes them feel vintage.
I know these are fall themed, but they would be great cookies for a first birthday party, baby shower, or even a harvest party.
If you want to package your apple decorated sugar cookies, check out my post that goes over how to package buttercream sugar cookies.
Save the Tutorial for These Apple Decorated Sugar Cookies
Use the image below to pin this tutorial for apple sugar cookies to your fall or baking board on Pinterest. Alternatively, use any of the social share icons on the top of the page to share it to your favorite social media site.